Railfreight Metals BMA Wagon

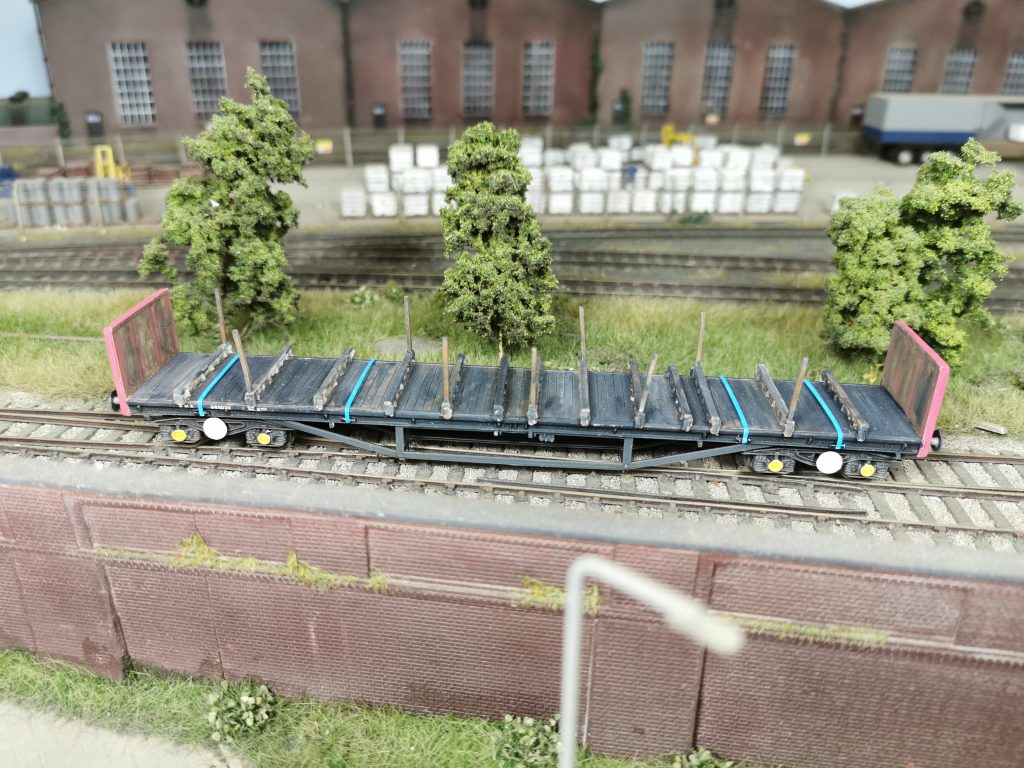
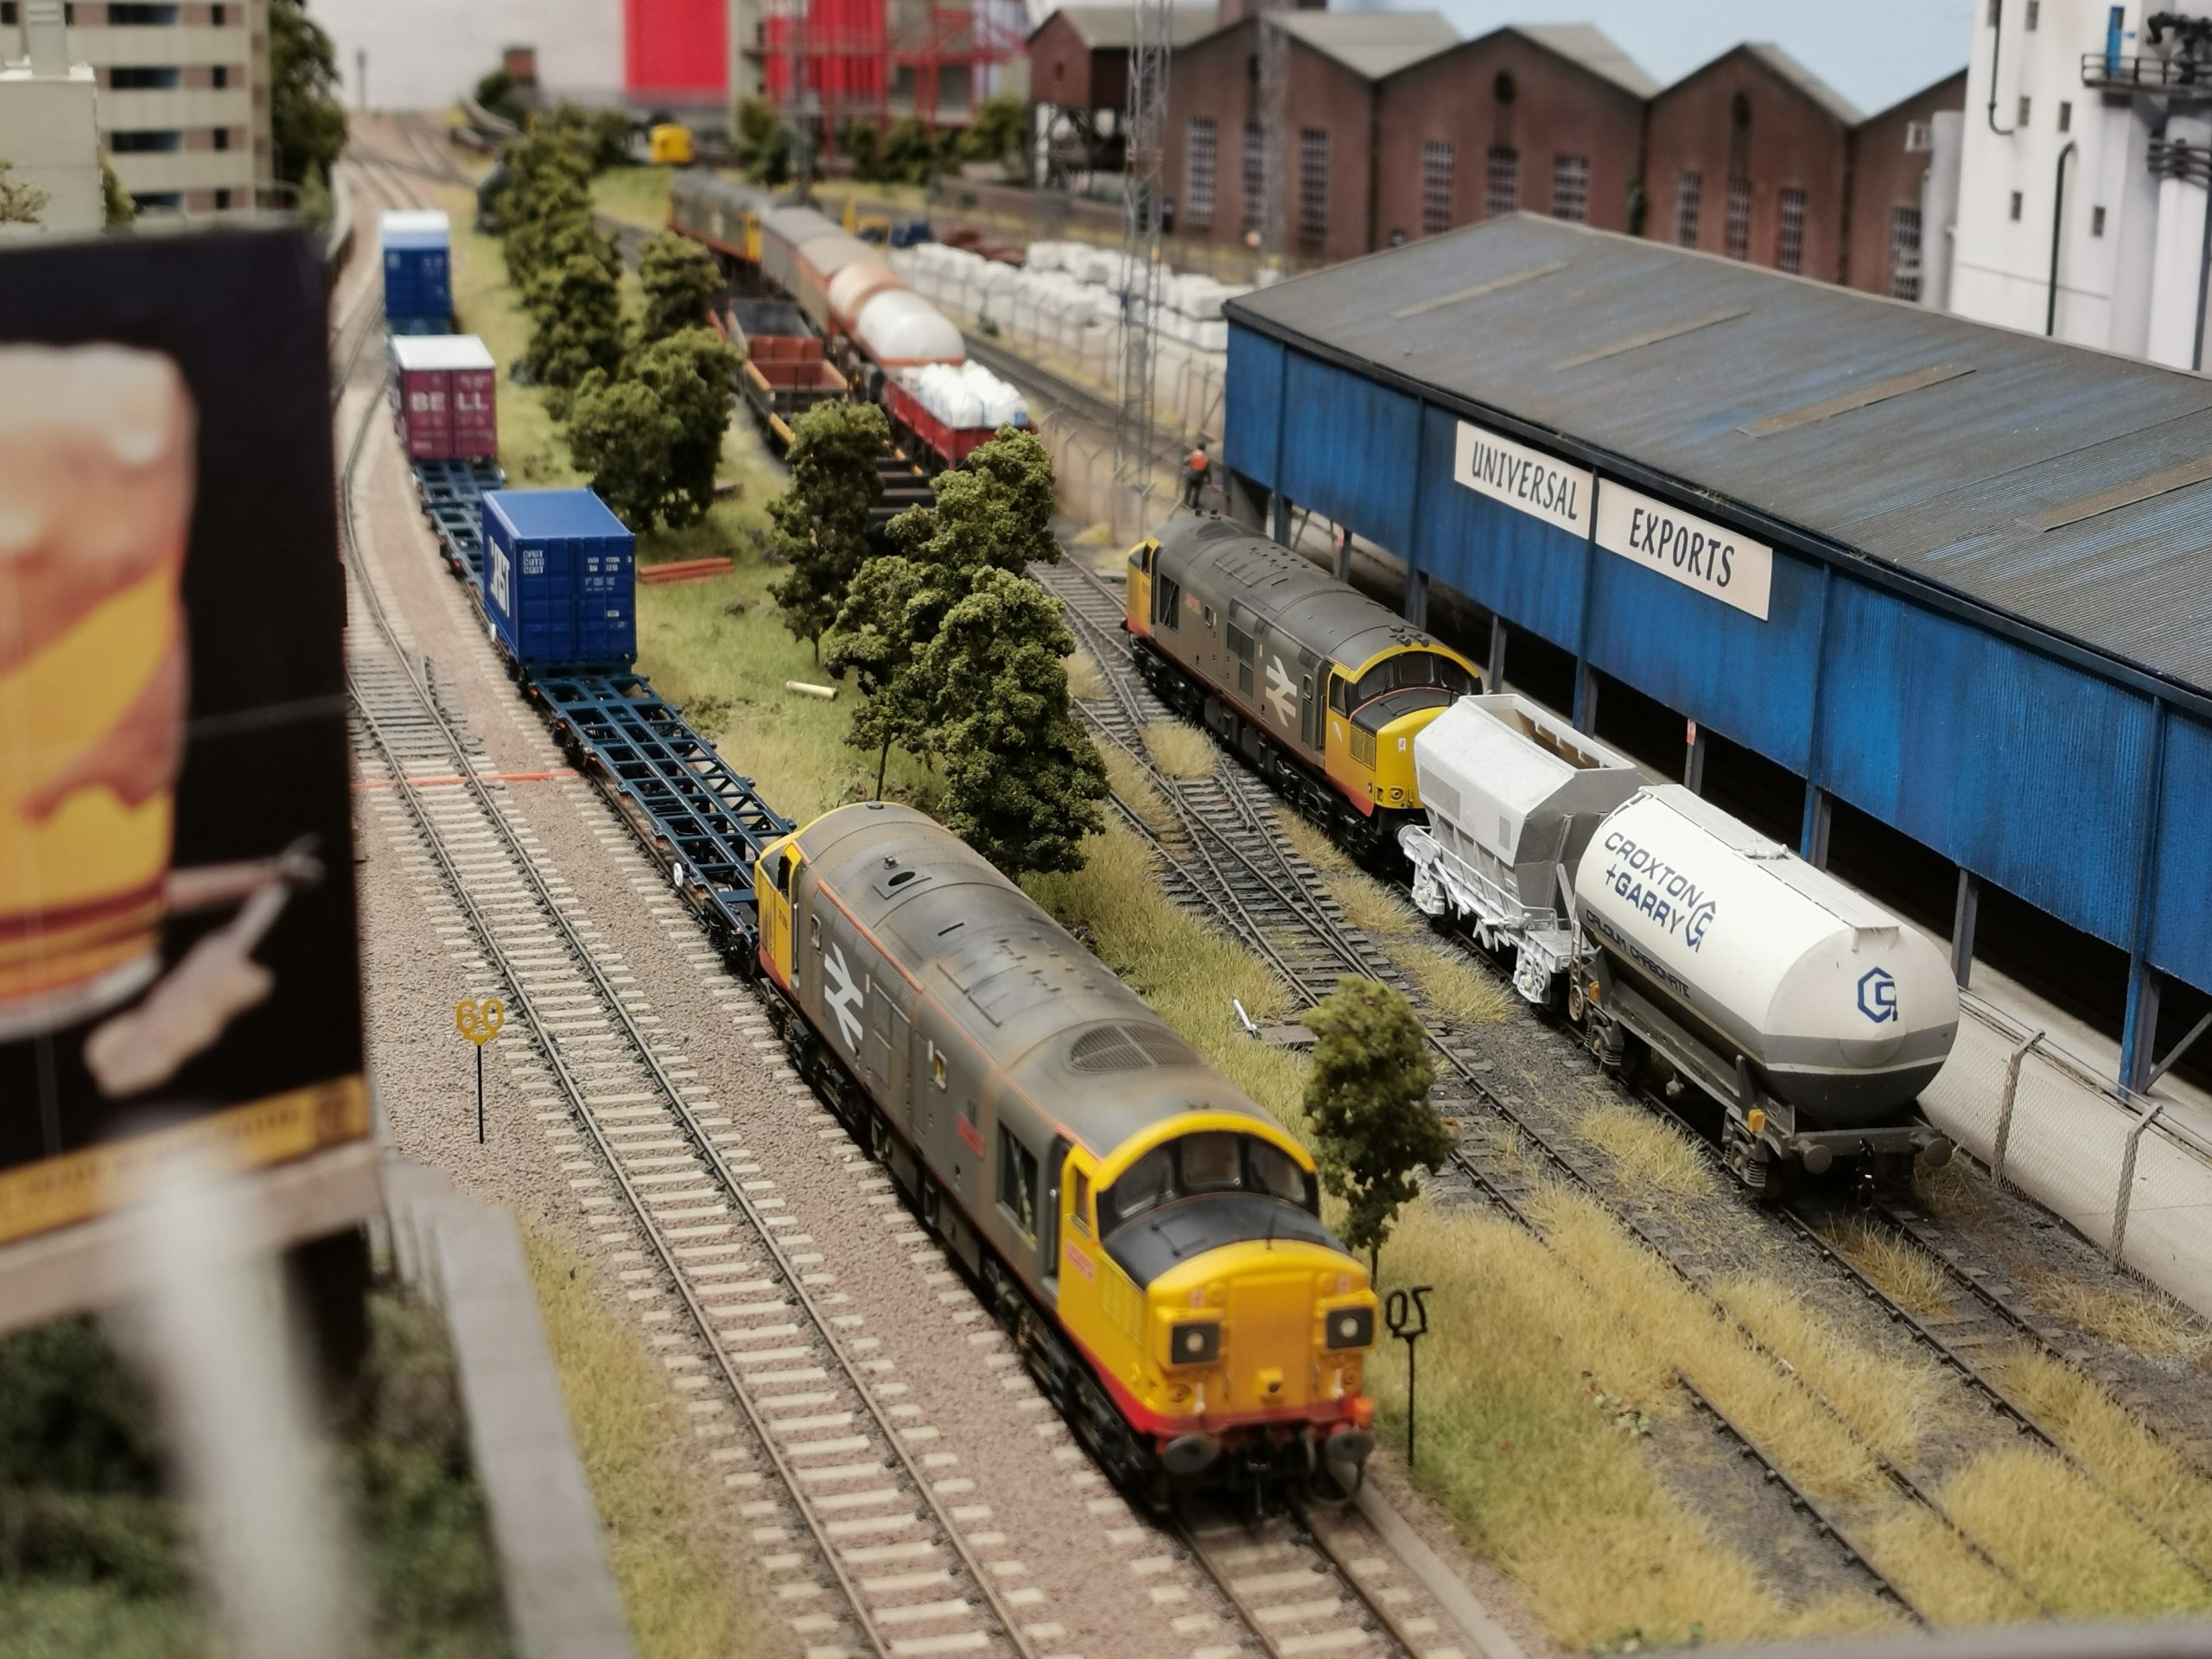
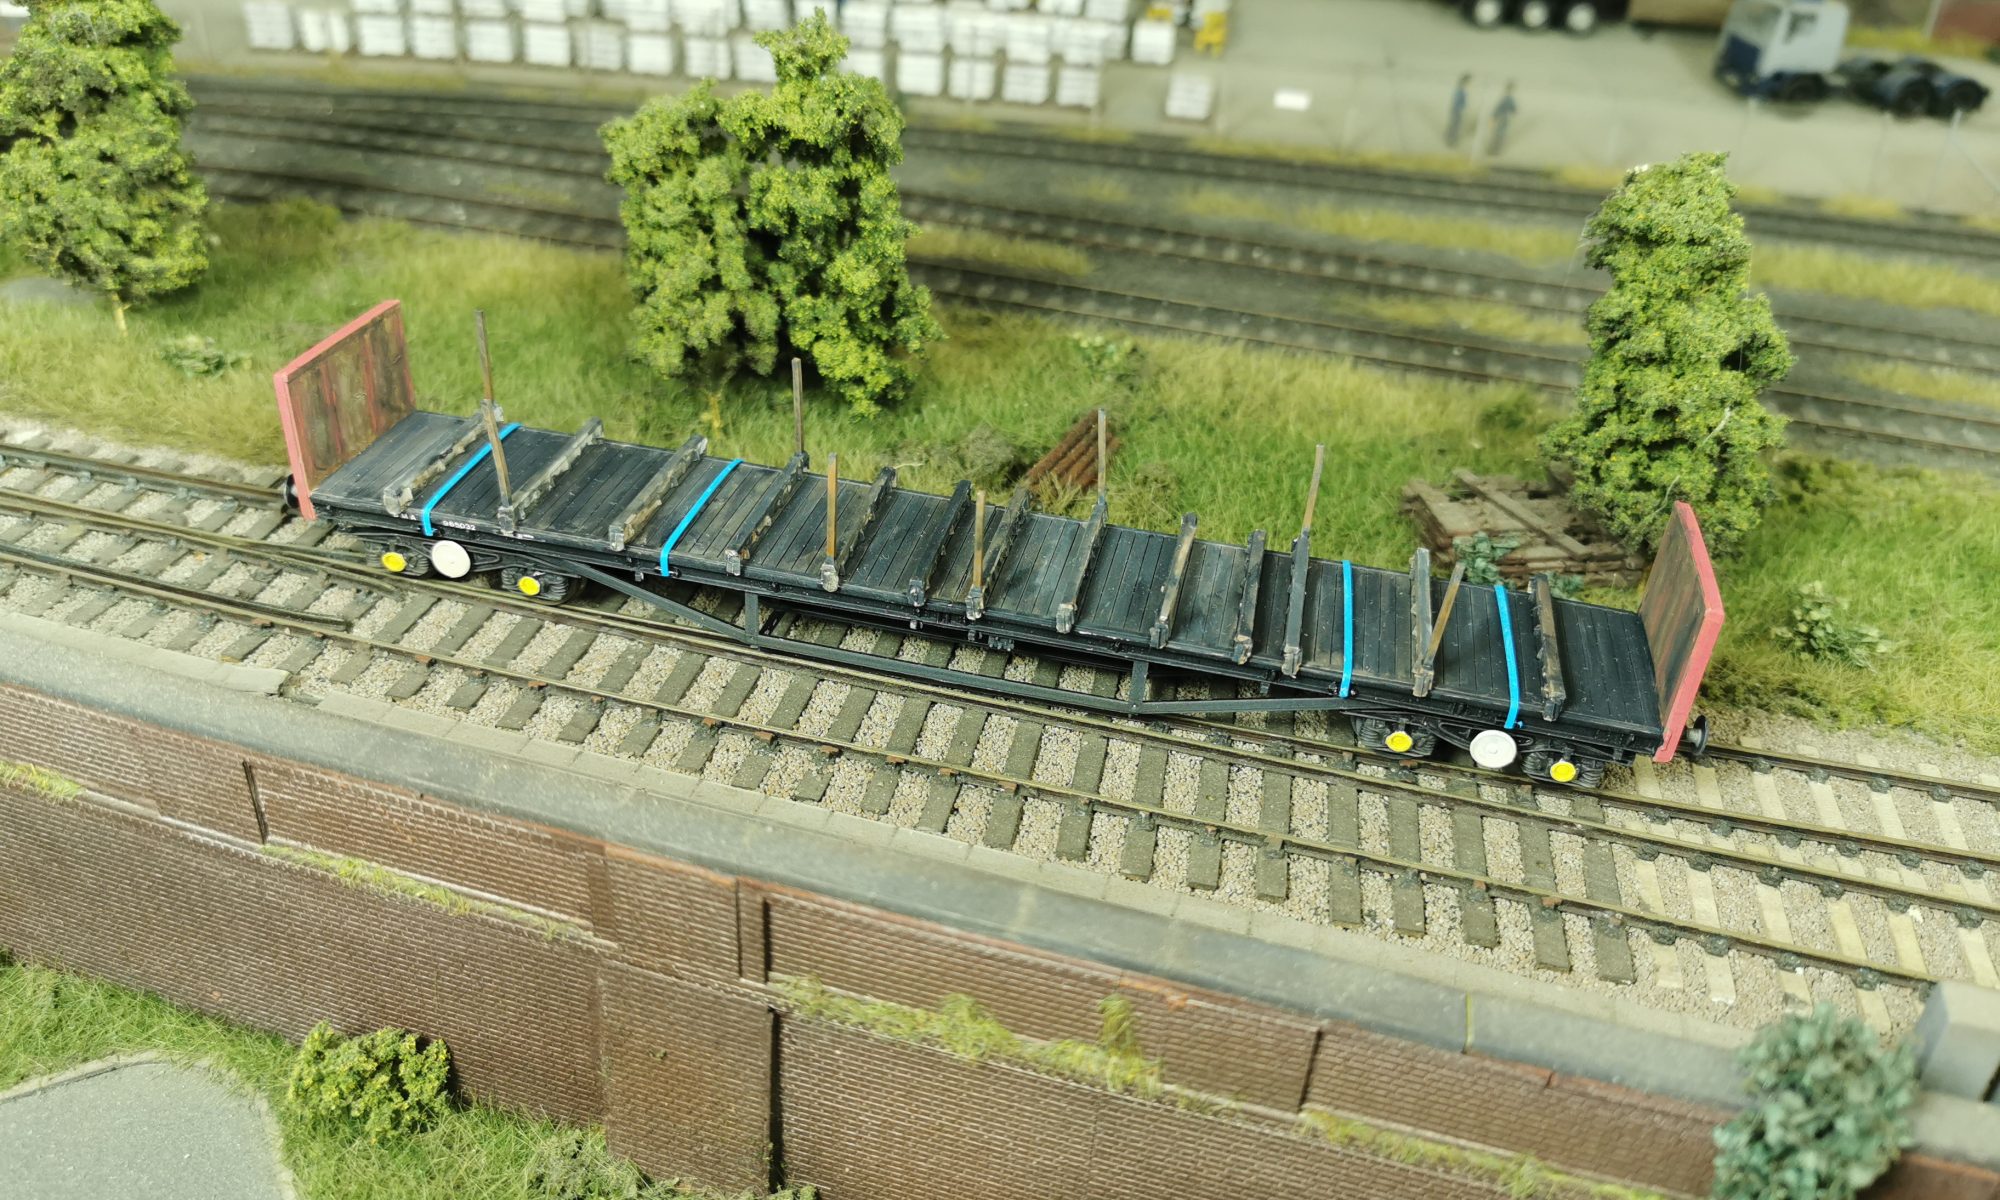
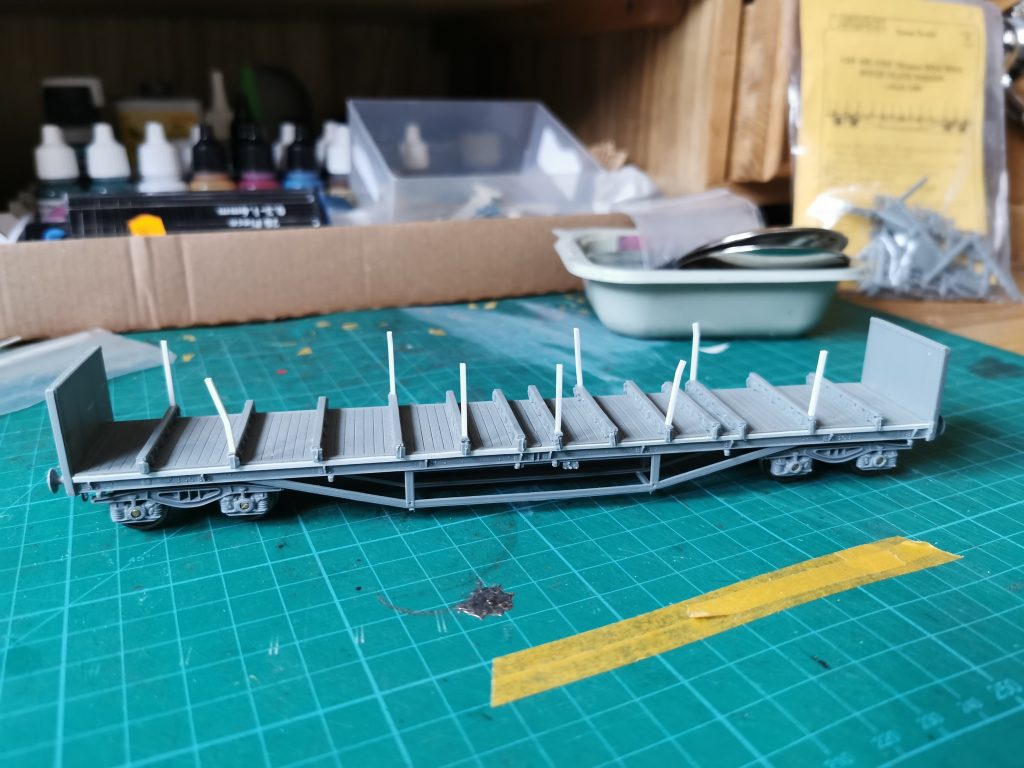
With a couple of hours of free time, I managed to build a Cambrian BMA wagon. In 1980, eighty Boplates were rebuilt with air brakes and new bogies. After deciding on a prototype photo I built this kit as the instructions intended, with the addition of a 1mm x 0.5mm styrene stip to the sides. I’ve also added and bent some stanchions using 1mm x 1mm styrene square rod.

BMA ready for painting

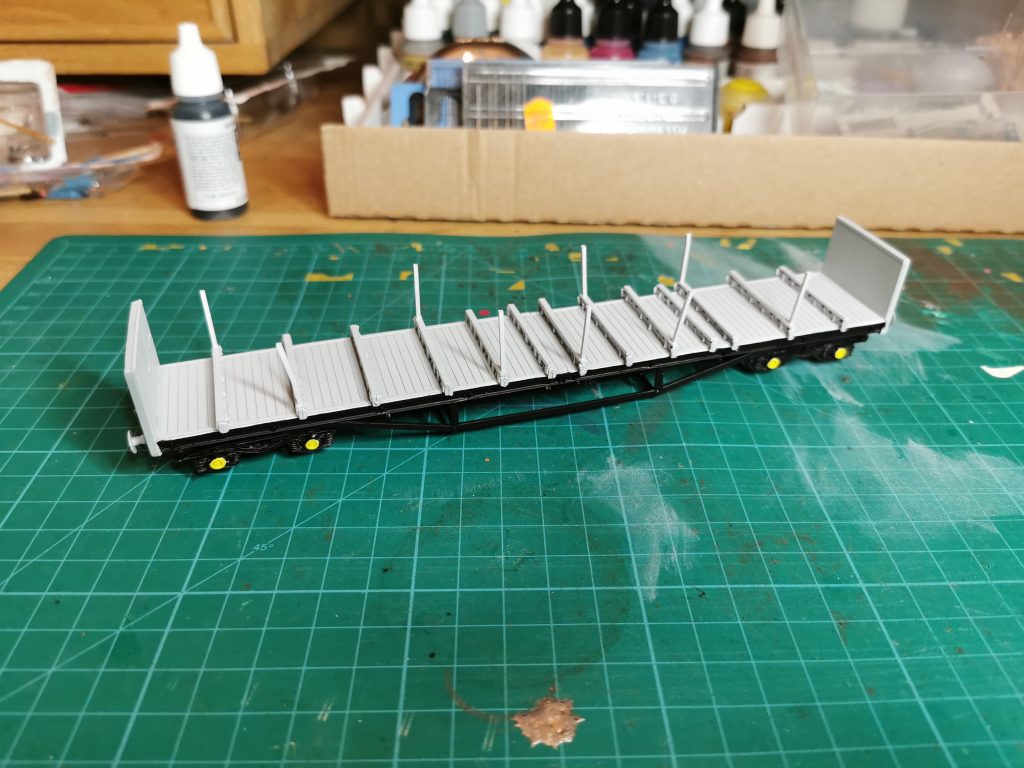
I thought about how I would paint this wagon, and concluded the easiest way would be to brush paint it. First though, I sprayed the whole wagon with Vellajo Grey Primer. The chassis was then painted black, and the axle boxes yellow.

Chassis and axle boxes painted

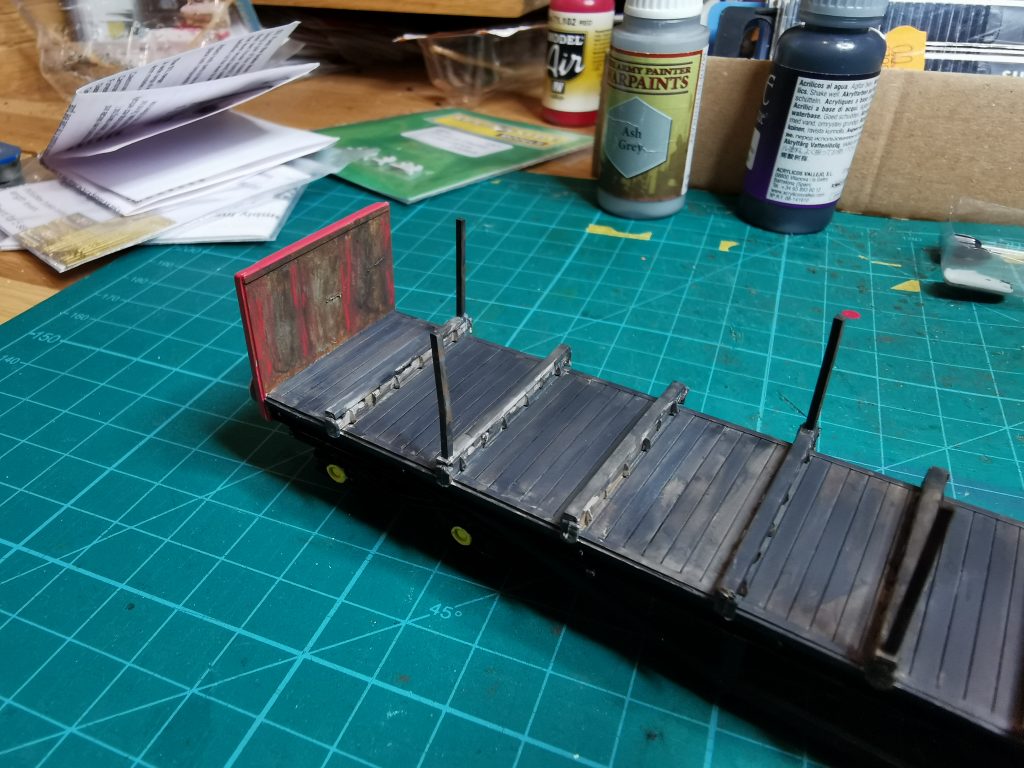
I then mixed some red, yellow and white until I had a railfreight Red that I was happy with. The outer ends were then painted, followed by the internal ends with a mix of brown leather and Charcoal grey.

The prototype photos show the BMA with dark wooden decks, so this and the bolsters where painted with a thinned wash of Charcoal Grey and Ash Grey to give a weathered wood effect. There’s a good photo here showing the wooden deck of a Boplate. The inner ends were also given a hint of railfreight Red, as this was something I spotted on one of Paul Bartlett’s photos from 1989.

Inner ends and wooden deck

The wagon was numbered using a mix of individual numbers and letters, and the brake handwheels where added and painted white.

965032 numbers added

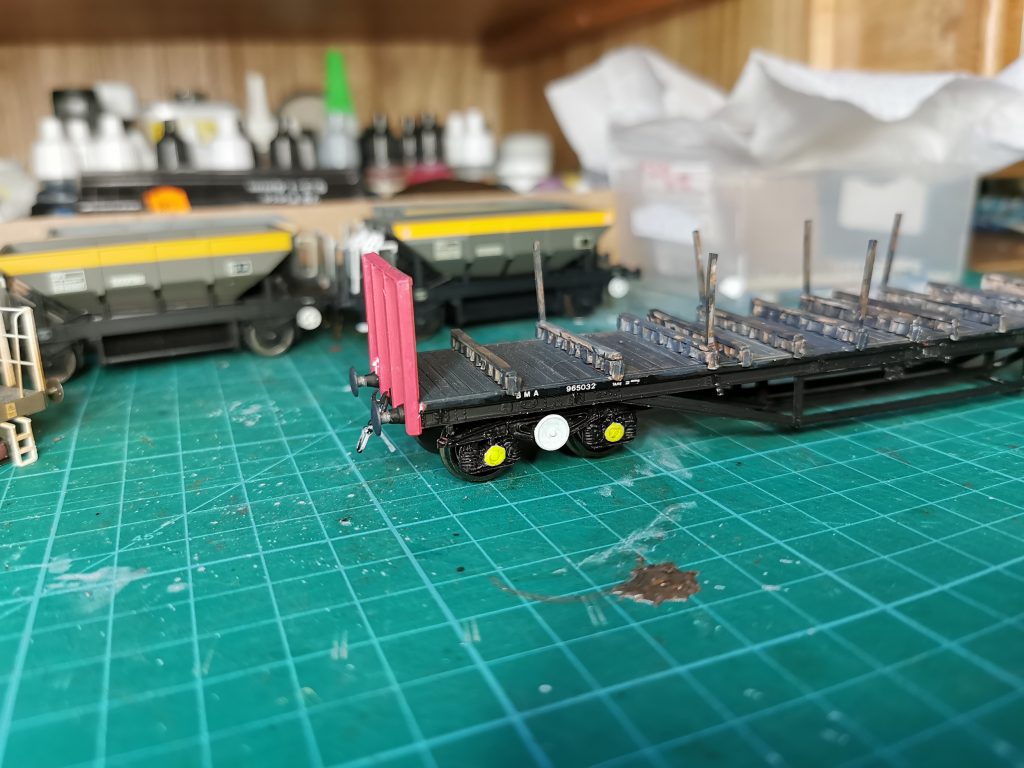
Finally, the wagon was weathered with the airbrush using the same colours and a wash applied to the outer ends for added work stains. Four blue ratchet straps were added to finish the model.

The finished BMA with straps added

Dutch ZTP Ex LMS Brake Van

Resprayed Hornby ZTP Dutch ex-LMS Brake Van

I’ve recently purchased two of these Hornby brake vans at a bargain price of £14.95 each. So, thoughts soon turned to what I would do with them.

For this one, I’ve found a prototype photo on Paul Bartlett’s website which I’m going to use as a guide.

I started by removing the handrails and dismantling the van. I also drilled out the handrail holes making them slightly wider, which aids refitting and prevents them from looking bent. I then removed the numbers and markings with Isopropyl Alcohol, and masked the door and ducket windows with Vallejo masking fluid.

Dismantled and ready for primer

Next, I primed the van with Vallejo grey primer through the airbrush. The following day, once this had dried properly, I sprayed the faded Dutch yellow using a mixture of Games Workshop Phalanx Yellow and Scar White. Once dry the yellow was masked up and Army Painter Ash Grey was sprayed on the remainder of the body.

The faded yellow

I applied gloss varnish with a brush to areas that required transfers. I find this speeds up the process, rather than airbrushing it. And the end result isn’t compromised. Then the transfers were applied and another coat of gloss varnish added to secure them permanently.

Transfers added

Note the electrification flashes. The one on the right is offset while the other is central.

The roof was next to be painted so Charcoal Grey was sprayed with the airbrush, after some careful masking. More Vallejo masking fluid was used over masking tape seams as a precaution. There is nothing worse than unnecessary overspray from poor masking!

Roof painted dark grey

A coat of matt varnish was sprayed from a rattle can. I’ve used many different brands of rattle can varnish over the years, but one I always recommend is Colour Forge. The finish is second to none.

Final tasks before weathering was to paint the lamp irons white and glue the handrails back in place.

Resprayed and ready for weathering

Weathering consisted of 3 colours applied lightly through the airbrush. Ash Grey, Brown Leather and Light Rust. The roof was also given a light blow over with Ash Grey, just to take the newness off the dark grey.

Just a light amount of weathering

47 971 ‘Robin Hood’

I recently purchased a model of MENTOR from a friend and realised I didn’t have any suitable traction for it. With a quick look through my collection of Bachmann Class 47’s, and some research time spent on class47.co.uk, a suitable doner loco was found.

The base model for this project

The base model for this project was Bachmann 31-660A 47 444 ‘University of Nottingham’, and once the body was seperated from the chassis, work began on removing the numbers.

This model has a round boiler plate cover, so that was shaved off using a sharp scalpel, and a replacement square etched brass boiler plate was fitted. This was supplied by Shawplan, part number EEDP47-15.

New etch boiler blanking plate fitted and primed.

47 971 has a non standard darker colour grey roof, so the next job was to mask up and respray it. I sprayed the etched roof details with white Etch Primer first, and after studying further photos of the prototype, I decided to paint the roof with Games Workshop Dawnstone Grey.

I then turned my attention to the cab fronts. While sorting through the spares box, I found a pack of Shawplan white metal MU fittings. I don’t think they are available anymore, and I think I bought them of Graham Shaw many years ago at Wolverhampton Model Railway Club’s exhibition. Anyway, a pilot hole was drilled and the MU fitting was painted before fitting using Games Workshop Jokaero Orange. The bufferbeam details were then added, with Romford screw link couplings and the fuel tank was swapped for the correct one for this loco.

The loco now received an acrylic gloss varnish, ready for Railtec Transfers. I used left over parts from other transfer sheets, but Railtec do a complete sheet for this loco. Note the numbers on the prototype are wonky and spaced further apart than normal! Once left to dry over night, a coat of acrylic matt varnish was applied. The loco just requires weathering to finish, but I’ll leave that for another day.

The finished 47 971 ‘Robin Hood’

Recreating 47 363 ‘Billingham Enterprise’

This week I’ve finished the iconic Railfreight class 47 workhorse, and it’s ready to enter service on Farkham.

The base model for this loco project is a Bachmann 47301, part number 31-655. The loco is already in Railfreight Red Stripe, but there are some differences that needed to be addressed first.

Bachmann 31-655 was the base for this project

Once the body was separated from the chassis, I removed the orange cantrail stripe, white body side stripe, numbers and the BR double arrows. I do this by placing the body in an old baking tray, and spraying oven cleaner onto the unwanted livery details. After 20 minutes, I repeat the process and after a further 20 minutes I rinse the oven cleaner off the model. Under warm water, the printed details can be easily scratched of with a thumbnail without affecting the paint work. It basically softens the factory printed details.

Factory printed details removed

The red stripe on 47 363 was only present on the grey bodyside, so I set to removing it from the yellow cabsides with a cotton bud and T-Cut.

Red stripe removed from the cab ends

One of the initial attractions to modelling this class 47, was the black faded numbers present on the body sides. Plenty of thought went into how I would recreate this feature, but I decided to use a sign writing vinyl cutter to make a stencil and spray the numbers. I then used a fine sanding stick to flat the painted numbers back, fading them like the prototype. The windows and cab interiors were then removed and a coat of acrylic gloss varnish was airbrushed over the model ready for transfers.

I used Railtec Transfers, which I highly recommend when using acrylic paints and varnishes. The numbers, BR double arrows, kingfishers and white cantrail stripes were all applied before a coat of matt varnish.

The transfers applied

The glazing and cab interiors were refitted to the body. Smiths screw link couplings and bufferbeam detailing were added before the body was reunited with the chassis. The marker light panels were flooded with thinned matt black paint before my thoughts turned to weathering.

47 363 ready for weathering

I usually like to combine a range of techniques, depending on the look of the prototype. Starting with the airbrush, a dusting of Railmatch Frame Dirt was applied to the chassis and lower bodysides. The roof had a coat of Railmatch Roof Dirt and the exhaust port received some matt black.

Next I applied Flory Models washes, starting with Dark Dirt to the roof. Using a flat brush in a downward direction and wiping the excess off with a damp sponge, again in a downward motion. To fade the bodysides, I used the white wash in the same way. Dark Dirt was then applied again where the oily deposits run down the body.

47 363 ‘Billingham Enterprise’ arrives at Farkham ready for its next Speedlink train.

Overall, I’m quite pleased with how this project has turned out, and 47 363 is now ready to be put into revenue earning service on Farkham.

The blog

Hello and welcome to my new blog, Farkham.

Here you’ll find everything you need to know about the layout, my rolling stock, projects and an occasional product review.

Farkham was originally built by Mickleover MRG and has enjoyed many years on the exhibition circuit. It was sold, to me, in February 2018 and now enjoys a well earned retirement.

I’ve started this blog, and Farkham’s social media, as it would be a real shame to keep the layout hidden away.

Farkham, in the future, will see some changes and updating. The layout will be changed from an end to end format, to a tail chaser and converted to DCC with block detection.

Check back soon for more updates, and follow Farkham on social media.