47 971 ‘Robin Hood’

I recently purchased a model of MENTOR from a friend and realised I didn’t have any suitable traction for it. With a quick look through my collection of Bachmann Class 47’s, and some research time spent on class47.co.uk, a suitable doner loco was found.

The base model for this project

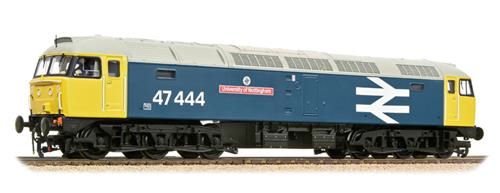
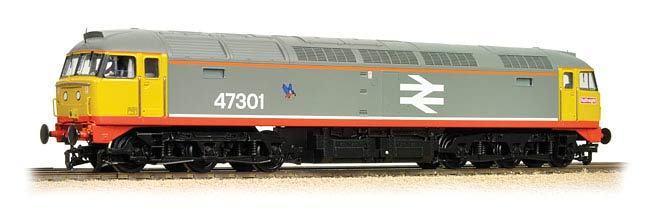
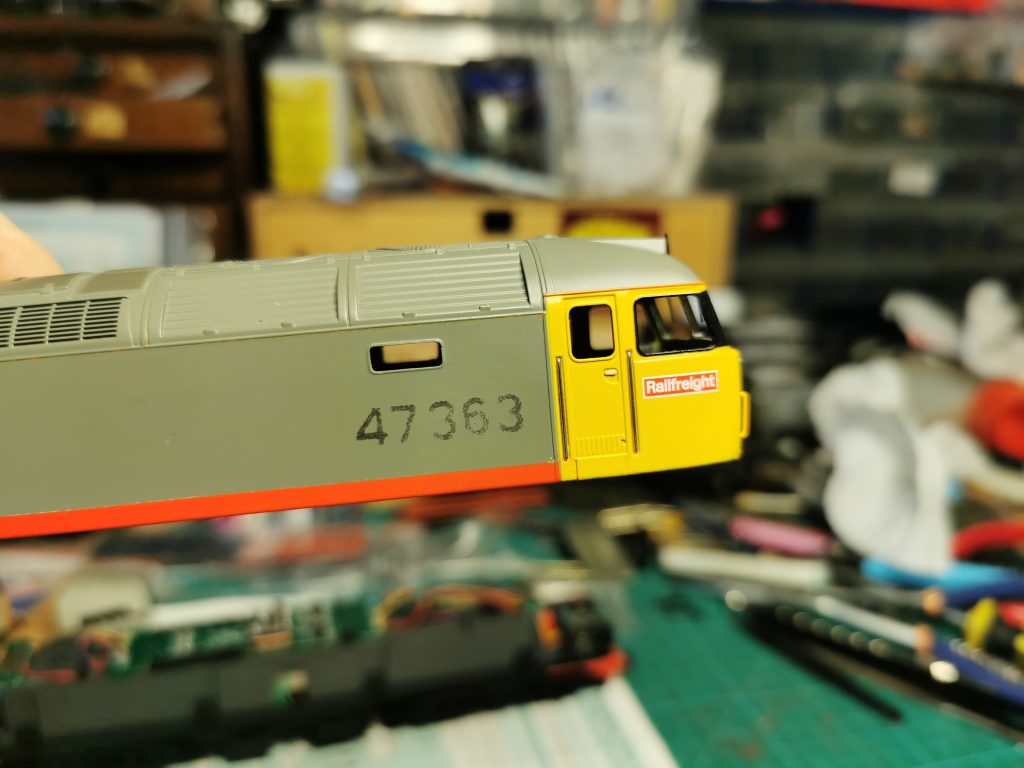
The base model for this project was Bachmann 31-660A 47 444 ‘University of Nottingham’, and once the body was seperated from the chassis, work began on removing the numbers.

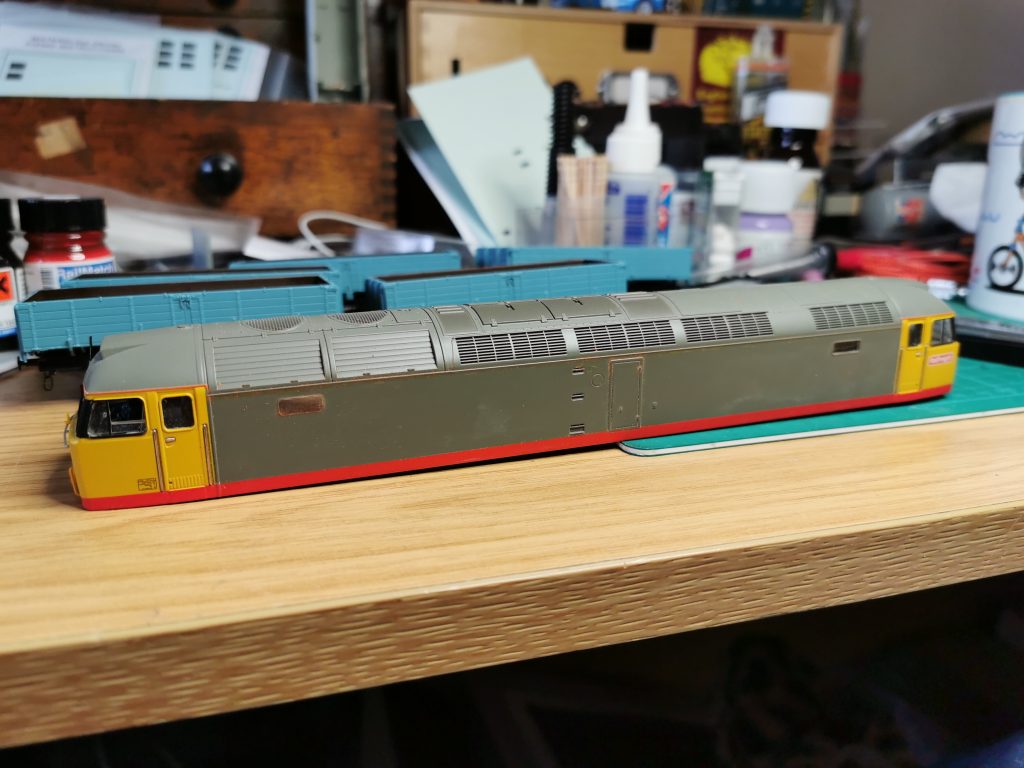
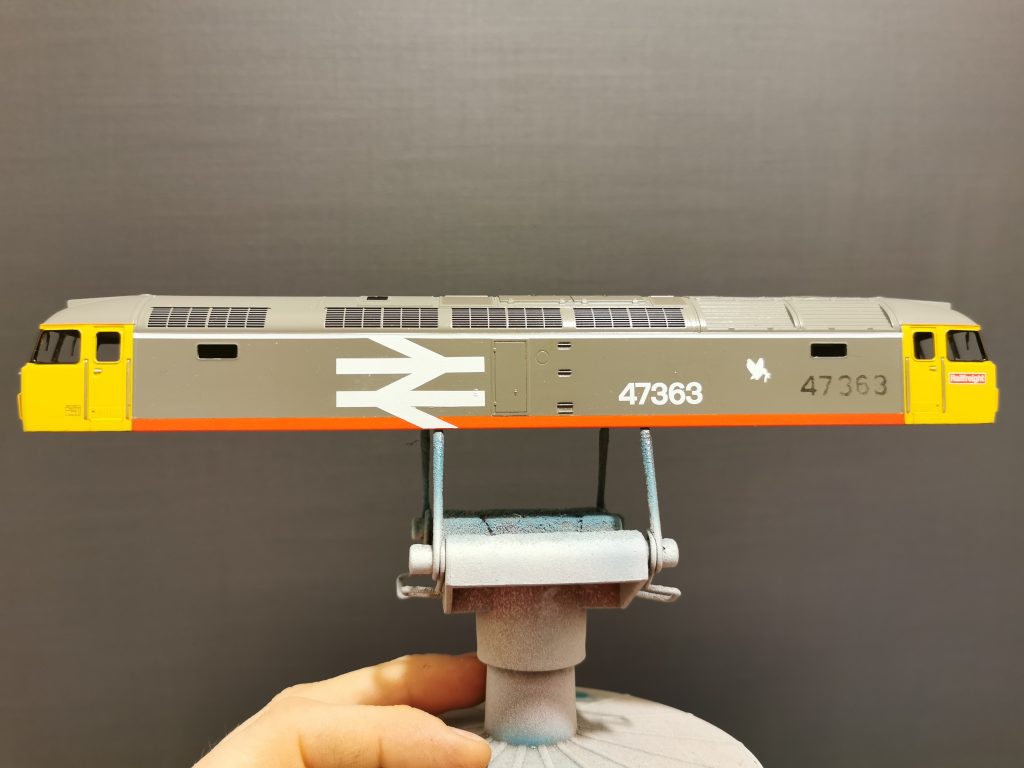
This model has a round boiler plate cover, so that was shaved off using a sharp scalpel, and a replacement square etched brass boiler plate was fitted. This was supplied by Shawplan, part number EEDP47-15.

New etch boiler blanking plate fitted and primed.

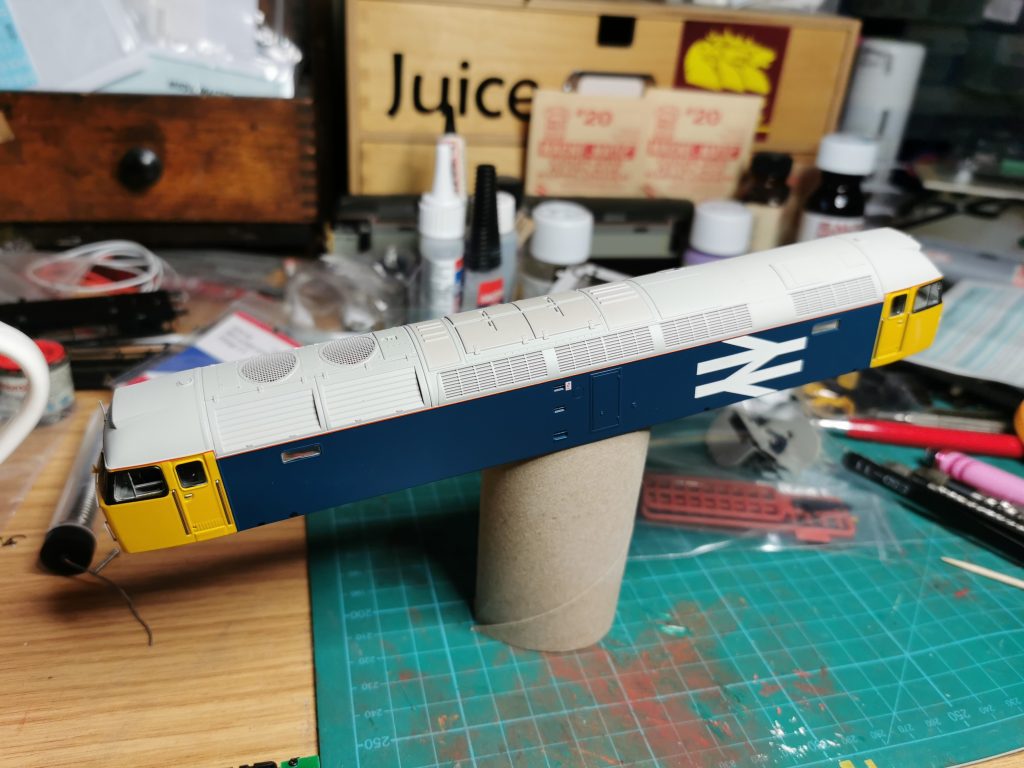
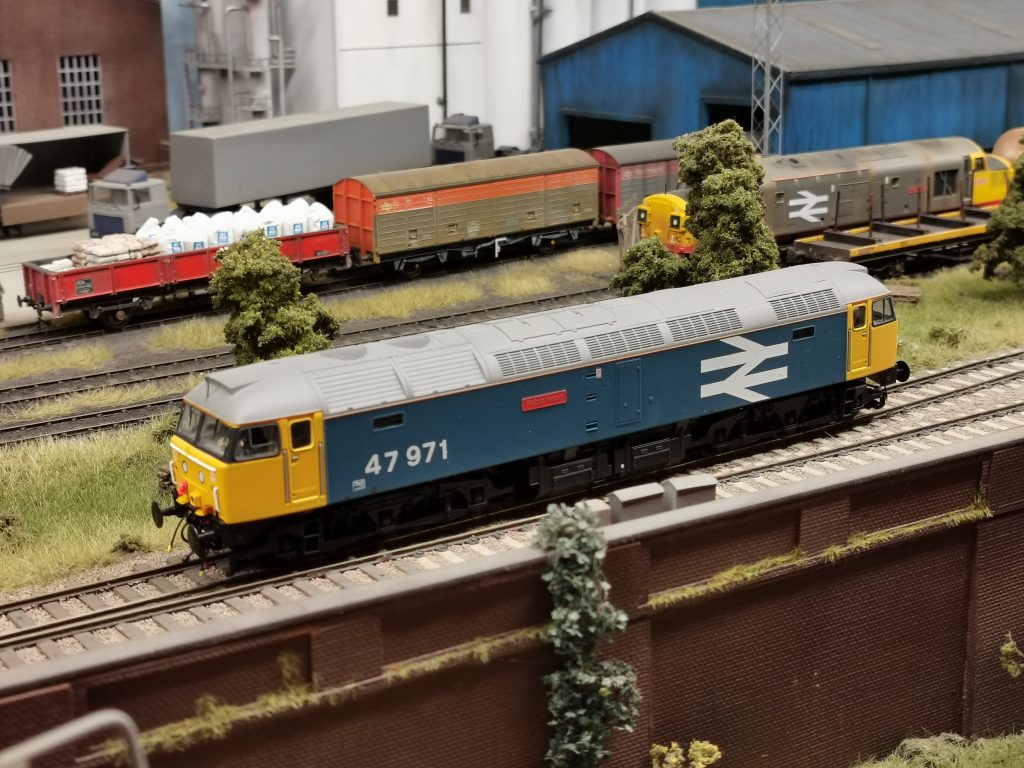
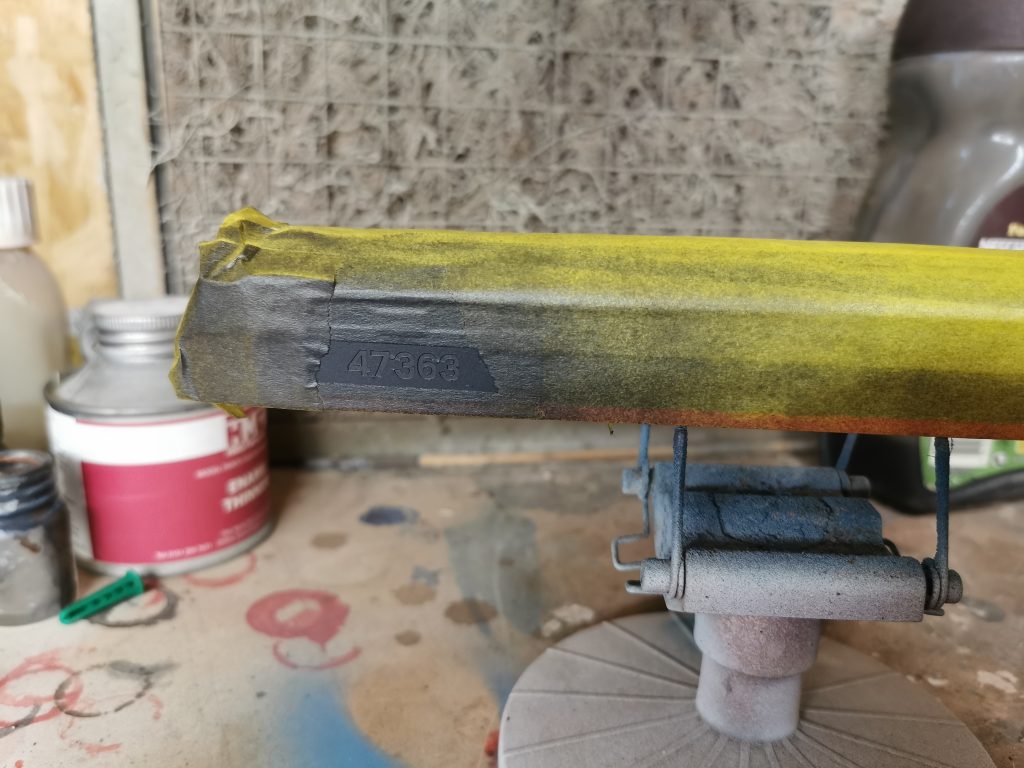
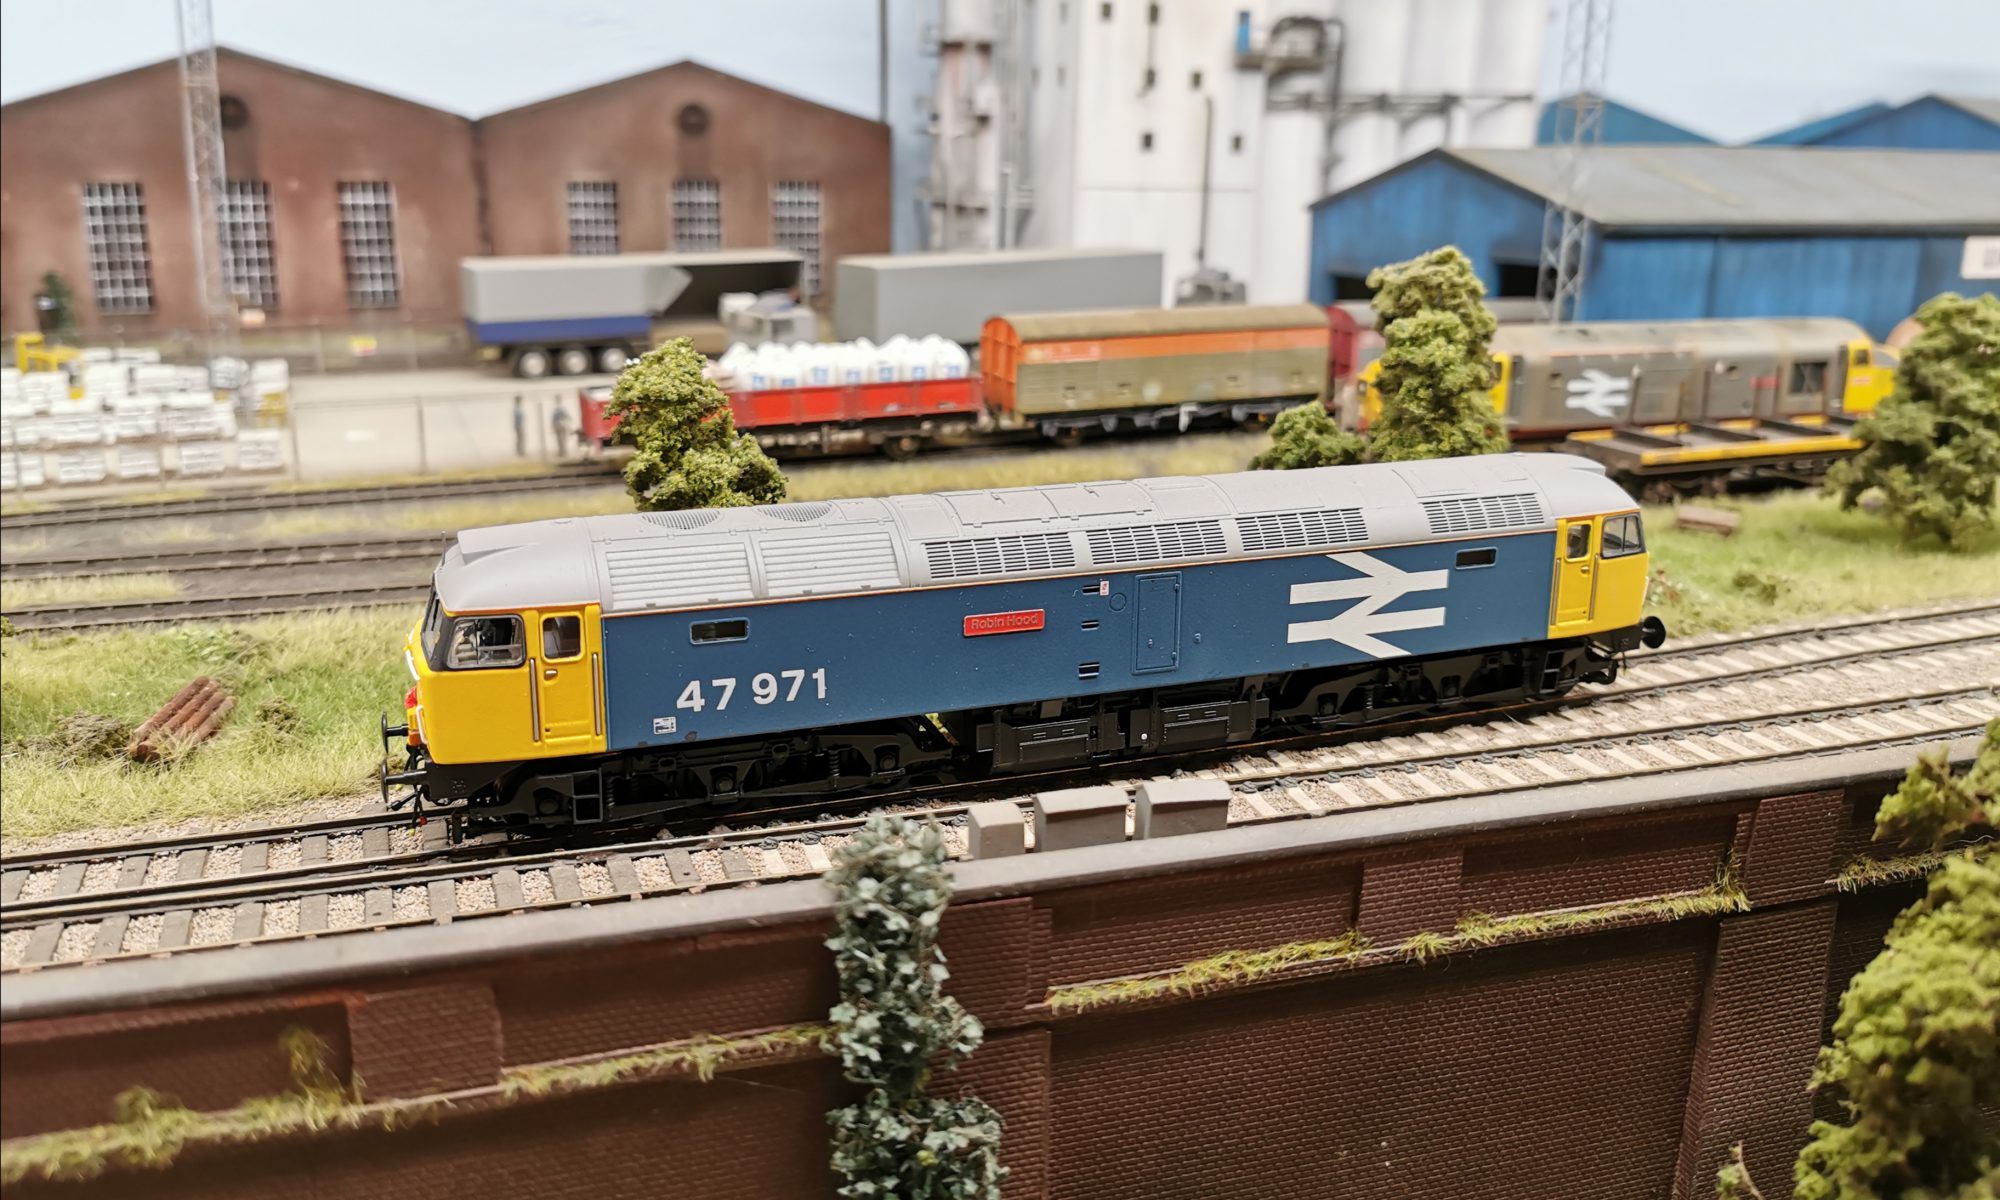
47 971 has a non standard darker colour grey roof, so the next job was to mask up and respray it. I sprayed the etched roof details with white Etch Primer first, and after studying further photos of the prototype, I decided to paint the roof with Games Workshop Dawnstone Grey.

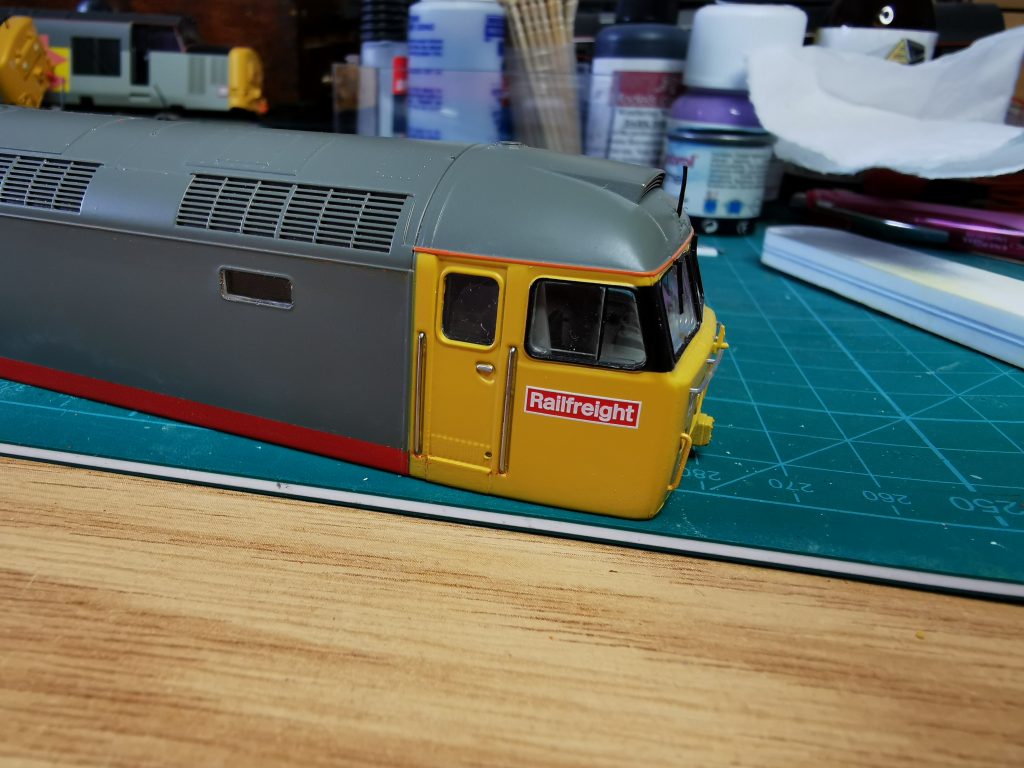
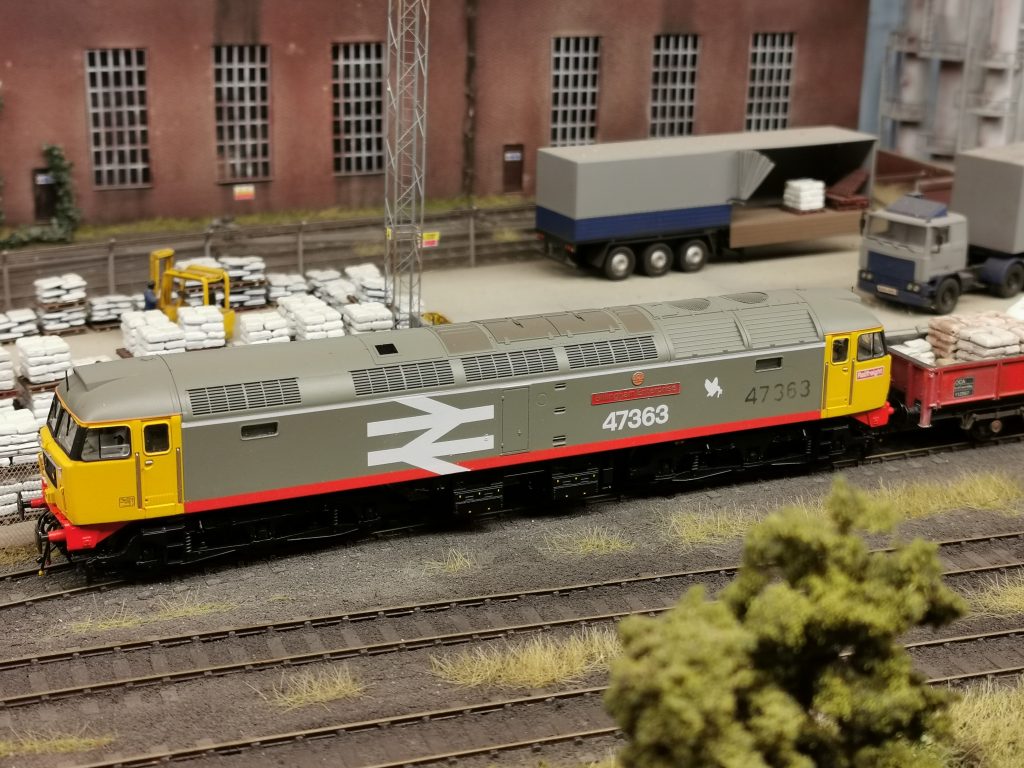
I then turned my attention to the cab fronts. While sorting through the spares box, I found a pack of Shawplan white metal MU fittings. I don’t think they are available anymore, and I think I bought them of Graham Shaw many years ago at Wolverhampton Model Railway Club’s exhibition. Anyway, a pilot hole was drilled and the MU fitting was painted before fitting using Games Workshop Jokaero Orange. The bufferbeam details were then added, with Romford screw link couplings and the fuel tank was swapped for the correct one for this loco.

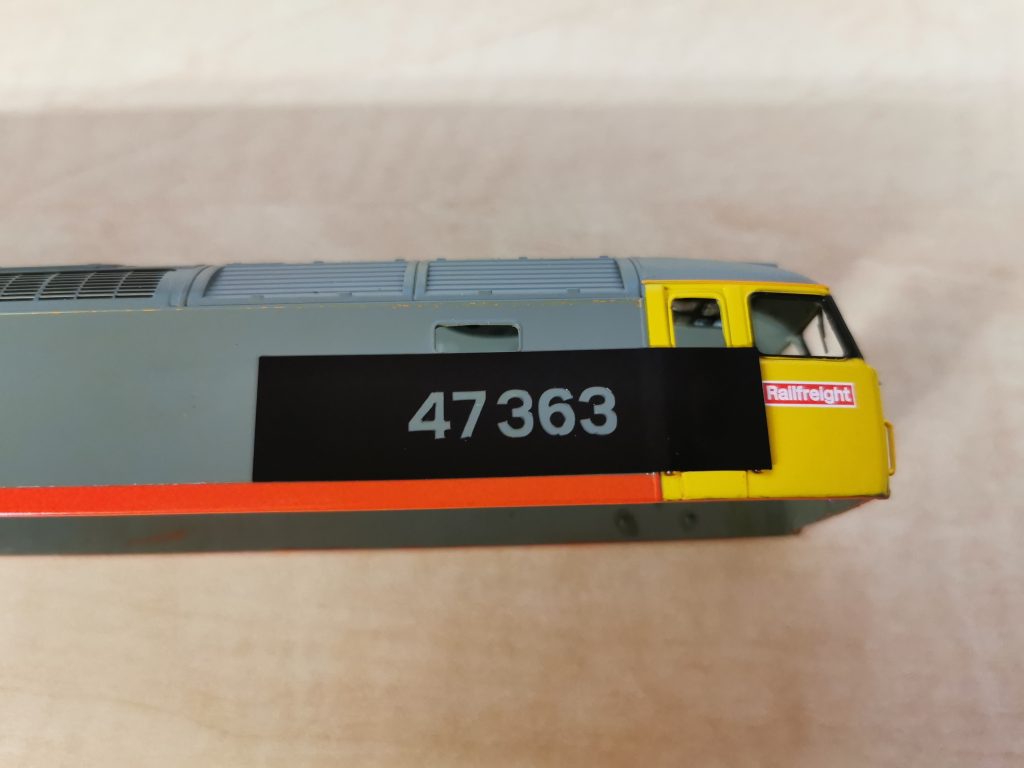
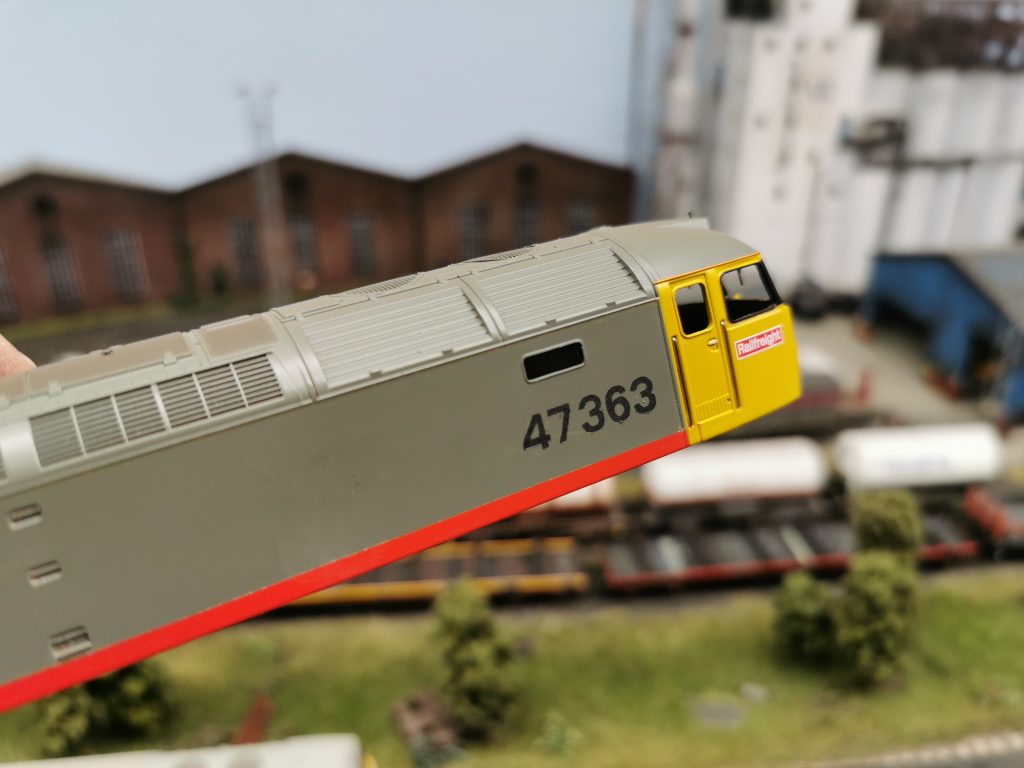
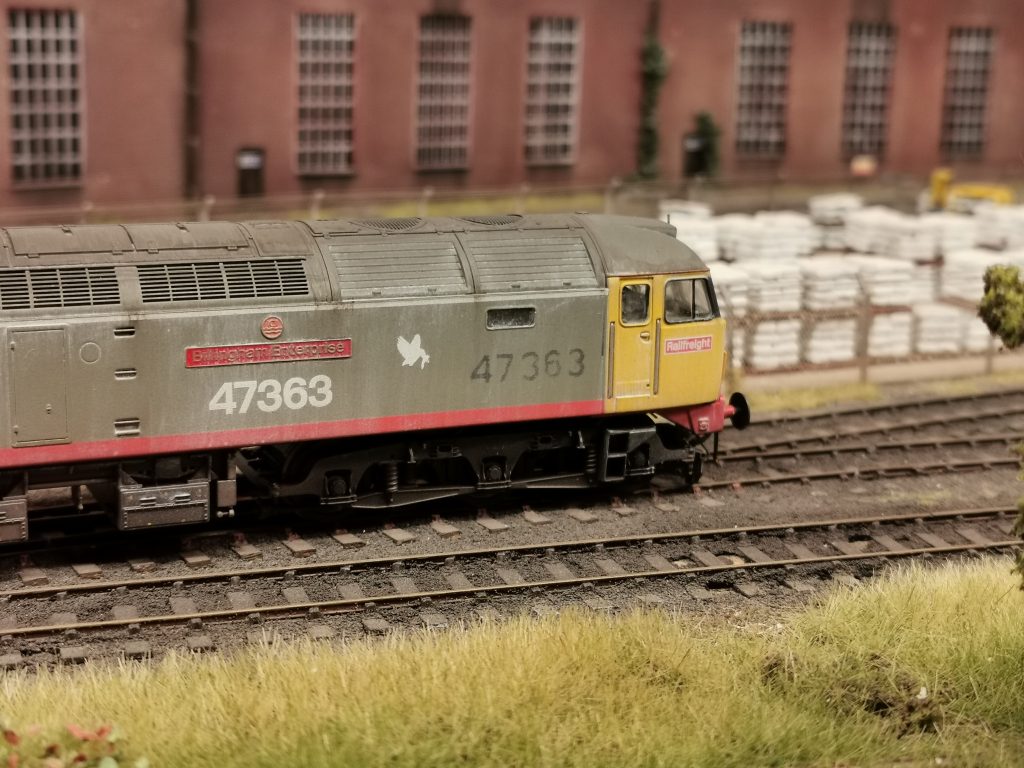
The loco now received an acrylic gloss varnish, ready for Railtec Transfers. I used left over parts from other transfer sheets, but Railtec do a complete sheet for this loco. Note the numbers on the prototype are wonky and spaced further apart than normal! Once left to dry over night, a coat of acrylic matt varnish was applied. The loco just requires weathering to finish, but I’ll leave that for another day.

The finished 47 971 ‘Robin Hood’

Recreating 47 363 ‘Billingham Enterprise’

This week I’ve finished the iconic Railfreight class 47 workhorse, and it’s ready to enter service on Farkham.

The base model for this loco project is a Bachmann 47301, part number 31-655. The loco is already in Railfreight Red Stripe, but there are some differences that needed to be addressed first.

Bachmann 31-655 was the base for this project

Once the body was separated from the chassis, I removed the orange cantrail stripe, white body side stripe, numbers and the BR double arrows. I do this by placing the body in an old baking tray, and spraying oven cleaner onto the unwanted livery details. After 20 minutes, I repeat the process and after a further 20 minutes I rinse the oven cleaner off the model. Under warm water, the printed details can be easily scratched of with a thumbnail without affecting the paint work. It basically softens the factory printed details.

Factory printed details removed

The red stripe on 47 363 was only present on the grey bodyside, so I set to removing it from the yellow cabsides with a cotton bud and T-Cut.

Red stripe removed from the cab ends

One of the initial attractions to modelling this class 47, was the black faded numbers present on the body sides. Plenty of thought went into how I would recreate this feature, but I decided to use a sign writing vinyl cutter to make a stencil and spray the numbers. I then used a fine sanding stick to flat the painted numbers back, fading them like the prototype. The windows and cab interiors were then removed and a coat of acrylic gloss varnish was airbrushed over the model ready for transfers.

I used Railtec Transfers, which I highly recommend when using acrylic paints and varnishes. The numbers, BR double arrows, kingfishers and white cantrail stripes were all applied before a coat of matt varnish.

The transfers applied

The glazing and cab interiors were refitted to the body. Smiths screw link couplings and bufferbeam detailing were added before the body was reunited with the chassis. The marker light panels were flooded with thinned matt black paint before my thoughts turned to weathering.

47 363 ready for weathering

I usually like to combine a range of techniques, depending on the look of the prototype. Starting with the airbrush, a dusting of Railmatch Frame Dirt was applied to the chassis and lower bodysides. The roof had a coat of Railmatch Roof Dirt and the exhaust port received some matt black.

Next I applied Flory Models washes, starting with Dark Dirt to the roof. Using a flat brush in a downward direction and wiping the excess off with a damp sponge, again in a downward motion. To fade the bodysides, I used the white wash in the same way. Dark Dirt was then applied again where the oily deposits run down the body.

47 363 ‘Billingham Enterprise’ arrives at Farkham ready for its next Speedlink train.

Overall, I’m quite pleased with how this project has turned out, and 47 363 is now ready to be put into revenue earning service on Farkham.

REVIEW: Accurascale PTA/JTA+JUA Bogie Tippler Wagons

The latest offering from Accurascale is now available and pre-orders have been shipped to customers. There are currently a very limited number available for sale, due to high demand so be quick if you want these.

The Prototype

The model and livery depicted here represtents the second batch of wagons produced. They feature strengthened ribbing, horizontal end ribbing and BSC Axle Motion bogies. The numbers and markings on these wagons represent vehicles which entered service between Redcar and Consett. With the closure of Consett in 1981, the wagons worked between Ravenscraig and various loading points in the north such as Thrislington, Hunterston and Hardendale. Although, after the closure of Ravenscraig in 1992, some of the wagons were transferred to Llanwern traffic.

Wagons are discharged by passing through a rotating tippler. This requires a unique coupling which can unlock from the rest of the train during this operation. For this reason, the inner wagons have a fixed buckeye-type coupling at one end, and a rotating one at the other. Outer wagons have conventional screw link couplings at the outer end. The orange end on this livery represents the rotating coupling end, ensuring the wagons are marshalled correctly.

The Model

Each wagon pack contains five excellently represented wagons, each having unique running numbers. The packaging has a high quality feel, and opens like a book with a magnetic catch. The underframes contain a good amount of detail, and the bufferbeam pipework has been fitted already. The buck eye couplings work well and look the part, while the outer wagons have standard NEM couplings. As I’ll fit screw link couplings to the outer wagons, it’s handy that the NEM sockets can be easily removed. There are spare air pipes to add on the outer wagons as understandably, these have been omitted to allow clearance for the standard NEM couplings. One outer wagon has a battery operated flashing tail lamp. The battery is included and was easily installed under the wagon floor out of sight. A switch is located on the underside to allow the tail lamp to be turned off easily when not in use. The bogie sides have been accurately modelled, and are designed to allow for easy conversion to EM or P4 gauge.

Conclusion

Overall, the PTA wagons are a welcome addition to Farkham. The quality is excellent, as you’d expect from Accurascale and I’d highly recommend them. The working flashing tail lamp is a first from any ready to run manufacturer.

So what’s next Accurascale? A slab sided Polybulk? Or perhaps sets of Cartic 4’s?

The blog

Hello and welcome to my new blog, Farkham.

Here you’ll find everything you need to know about the layout, my rolling stock, projects and an occasional product review.

Farkham was originally built by Mickleover MRG and has enjoyed many years on the exhibition circuit. It was sold, to me, in February 2018 and now enjoys a well earned retirement.

I’ve started this blog, and Farkham’s social media, as it would be a real shame to keep the layout hidden away.

Farkham, in the future, will see some changes and updating. The layout will be changed from an end to end format, to a tail chaser and converted to DCC with block detection.

Check back soon for more updates, and follow Farkham on social media.